Casatiello: Italian Brioche

I’ve been trying to guilt myself into finishing what needs to be finished lately and in the process have confirmed what I suspected: I am a closet un-finisher — someone who can run a great race then come to a dead stop inches from the finish line. Perhaps a quarter of a lap is more accurate, but you get the idea, I hope. With respect to my on-going obsession with food, this translates to a few projects I’ve become involved in then haven’t completed. In particular, tops on the list is the project Nicole of Pinch My Salt gave birth to, the Bread Baker’s Apprentice Challenge . Then there was my own quest to work through Bittman’s “101 Simple Salads for the Season” to help keep me healthy in the time leading up to the holidays. That would be the holiday season of 2009. It seemed completely reasonable to make five salads in a seven day period at the time. Most sadly, the Daring Bakers challenges have passed by, one after the other, and the months along with them. The first two projects have been long neglected in my writing, but I think of them from time to time because of the photos I’ve taken of the recipes completed. It’s torturous being reminded of one’s shortcomings in such vivid color and clarity. With respect to the Daring Baker challenges, I’ve got much more to make up than available time on my food calendar.
I’ve just sighed. You know that feeling, right? The one that lets you know you’re not all you’re chalked up to be. Yes, that one.
It’s humbling.
Nevertheless, I’ve decided that some attempt to breathe life into what I once considered worthy goals is important. I’ll blame this bit of retrospection on having to rebuild my photo libraries due to a new Mac and software. Viewing all of those photos provided me the opportunity to revisit quite a few recipes I made and enjoyed but never wrote about. It’s not quite like finding the perfect little black dress purchased on sale, then hung in the closet and forgotten until needed for a special occasion, but close. It’s all about promise.
Bread is like that — about promise. It generally promises that after all the steps — kneading, waiting, punching, shaping, and then waiting some more — you’ll actually get to taste it and share it with someone you know will like it. With respect to brioche, a bread containing a high percentage of butter, there is quite a bit of waiting. Most brioche dough has to rest overnight in the refrigerator, so it does take some thinking ahead if you are like I am — someone who doesn’t make bread as often as she’d like. I have made brioche before with good results, thanks to Sherry Yard’s Lean Brioche recipe. I’ve also made Reinhart’s Poor Man’s Brioche, but I’ll save that one for another time because his recipe for Casatiello is more interesting.
Casatiello is a savory Easter celebration bread from the Campania region of Italy. It is traditionally made with lard and baked in paper molds. The incorporation of salami and cheese are related to ancient associations with rites of spring and fertility. Today, lard is often omitted or in some cases, shortening used in its place. Additionally, many bakers use different types of cheese and meat.
I’ve added fresh sage to my adaptation of Reinhart’s recipe.

Casatiello: Italian Brioche
Sponge Ingredients
1/2 c. unbleached bread flour
1 T + 1/3 tsp. active dry yeast
1 cup buttermilk (from Saco cultured buttermilk dry blend)
Dough Ingredients
3-1/2 c. unbleached all purpose flour
1 tsp. kosher salt
1 T sugar
2 lg. eggs
sponge
3/4 c. unsalted butter, room temp
4 oz. dry salami, thinly sliced and chopped
3/4 c. sharp provolone, grated
1 T fresh sage, finely chopped
Directions
- Make the sponge first by mixing the flour and yeast in a small bowl and stirring in the buttermilk mixture until smooth. Cover with plastic and let sit at room temp to bubble up for about 1 hour.
- After the sponge has nicely bubbled and collapses when you tap the bowl, make the dough. In the bowl of a standing mixer, mix the flour, salt and sugar a bit before adding the eggs and sponge. Mix slowly until it comes together in a rough ball of dough. Make sure all the flour is incorporated, then continue to mix on medium for 1 minute before letting it rest for 10 minutes.
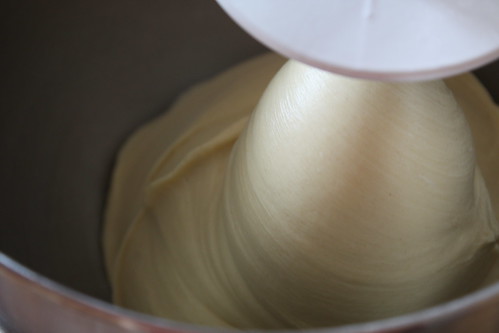
- Cut the butter into 4 pieces and with the motor running, mix it at medium speed into the dough making sure each piece of butter is completely incorporated before adding the next. Take time to scrape down the sides when necessary. Once the butter is incorporated, continue to mix the dough for about 4 minutes, then switch to the dough hook for an additional 6-8 minutes or until the dough leaves the side of the bowl and forms a ball. It will be smooth and silky.
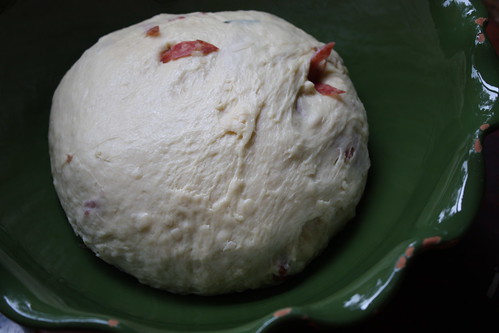
- Turn the dough out onto a lightly floured surface and carefully knead in the salami, cheese, and sage making sure all are as evenly distributed as possible. If the dough is sticky, dust it very lightly with flour. Clean out the mixing bowl, lightly oil it and put the dough ball inside. Roll it about to make sure it’s covered with oil, then cover the bowl with plastic and place a towel over it.
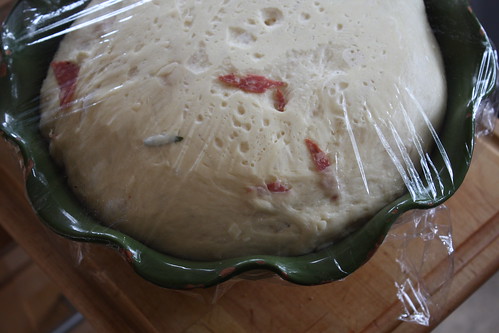
- Let the dough rise for 1-1/2 hours or until the dough is 1-1/2 times its original size. While it’s rising, prepare two brown lunch sacks by spraying the insides thoroughly with oil. Fold down the tops a couple of times, about and inch or so for each fold. Place them in small cake pans as close in size to the bags as possible. Place the pans on a baking sheet.
- At this point, divide the dough into 2 equal pieces. Dust the pieces lightly with flour and shape into boules. Place each piece of dough into a brown sack and adjust the height if necessary to be about 2-inches above the top of the dough. Lightly spray the dough with oil, then cover with plastic wrap. Proof for 1 to 1-1/2 hours or until the dough just reaches the top of the sack.
- Make sure to preheat the oven to 350 degrees F while the dough is proofing so it’s ready when the dough is.
- Bake the dough for 20 minutes, then turn the baking sheet 180 degrees and reduce the oven temperature to 325 degrees F. Bake for 4o more minutes or until the internal temperature is 185 to 190 degrees F and the bread is a rich golden brown.
- Remove from the pans to cool on baking racks, and cut small slits in the bags to allow steam to escape.


- I used the dry buttermilk blend with a bit more yeast and found that the sponge became very active very quickly.
- When incorporating the salami, cheese and sage, you’ll have to poke the pieces back into the dough. Be patient. I found this to be more challenging than expected in order to avoid having lumps of ingredients in the bread. The dough is very stretchy!
- I often use my oven proofer when I make bread, but I didn’t for this recipe. The dough was very active even though my kitchen is not the warmest place.
- I used my convection oven settings for this recipe because I prefer them for bread. This means I set the original temperature for 345 degrees F, baking the bread 17 minutes before the 180 degree turn, then lowered the temperature to 320 and baked the bread for only an additional 17 minutes — quite a bit less than the 40 minutes the original recipe calls for! Ultimately it’s important to keep an eye on the bread and insert that instant read thermometer if you suspect the bread is done.
- I used standard sized lunch bags for this recipe and placed them in 6-in. cake pans. If you can get smaller pans, it will provide more support. Reinhart suggests using coffee cans.
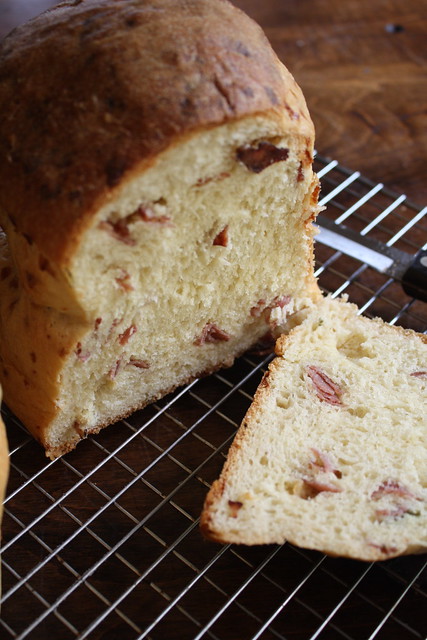
- This bread has a soft, but has a nice bite to it. The salami, cheese, and sage make it impossibly heavenly to inhale while it’s baking, and the flavor is truly delicious.